Book a private coaching session with an experienced mountain bike coach to simplify what can seem complicated. We are here to progress your skills and build confidence!
MTB & eMTB Private Coaching Sessions
FROM $350
022 600 6562
CALL NOW
022 600 6562
CALL NOW
022 600 6562
CALL NOW
022 600 6562
CALL NOW
022 600 6562
CALL NOW
022 600 6562
CALL NOW
"The pace of the session was great, lots of time actually riding and practicing new skills, no pressure to go beyond the safety zone and Jamie has an easy style, gives lots of feedback and makes plenty of helpful observations. Totally recommended!"
- Mark, Rotorua
Mountain bike lessons are the best way to build confidence by improving your skills on the bike and having some fun along the way. We tailor MTB skills sessions to each individual, pitching it to your current ability and your riding goals. Rotorua is the perfect place to improve your skills with trails from beginner to expert all in one place!
By layering skills at your pace and coaching you along the way, you are guaranteed to come out of the other end with more confidence on your bike. We can help you on corners, more technical trails with roots, drops, jumps and knowing what your bike is really capable of. We lay the foundations and then build your MTB skills to take your riding further and help you achieve your goals.
The lesson is followed up with information and videos on what was covered so that you can refer back and keep progressing your riding.
If your dates are unavailable or you have questions fill in the form below or
GRADE 1-5 BEGINNER – ADVANCED
DURATION 3 HOURS
ROTORUA BASED
TAILORED TO SUIT YOU
MOUNTAIN BIKE & eMTB LESSONS
COST FROM $350
Bring your friends or family along – only you can add additional riders (up to 6 total) to join your private session for an extra $100pp.
We offer gift vouchers for people who are looking at getting something meaningful for a friend, family member, or workmate. Gifting an experience can be seen as a more meaningful gift than a material item.
Experience gifting is when you give someone a gift that is a life experience or adventure rather than a material item. It is a ‘doing’ gift. More and more, people are turning away from mindless consumerism and opting instead for experiences that will enrich their gift recipients, inspire them and teach them. Ultimately, experience gifts leave your gift recipient with wonderful memories that they can look back on.
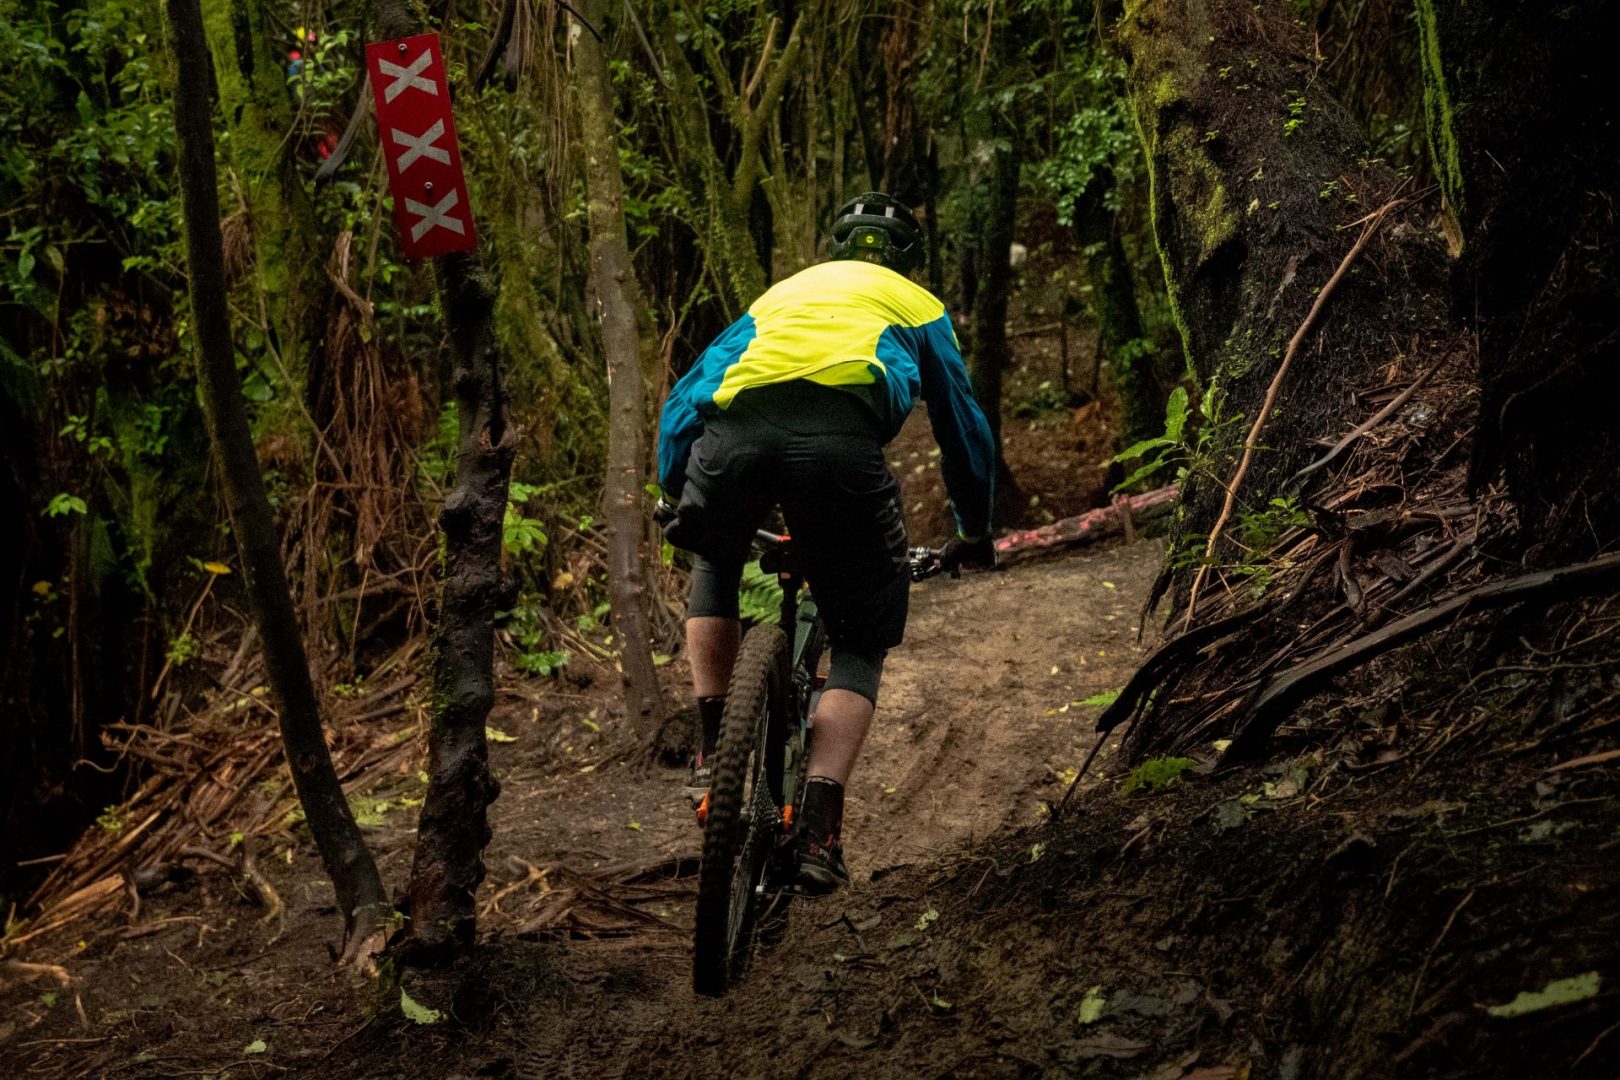
Body Position = Confidence
As one of the fundamental MTB skills that we cover, we will teach you how to descend with more confidence. Whether you are trying to get down the gnarly stuff or are just out for casual mountain bike rides and want to feel more in control of your bike – We have you covered! With the correct body position, your confidence will soar! Your stability will increase so that you can relax more, your control will get better as your bike and body start to move independently of each other, you will look super stylish as you ride new trails with more skill and awareness.
Check out the video to see an example of basic body position or check out our blog about it here!
Braking – How to go faster
Until you know how to use your brakes confidently, you are not going fast where you can go fast, and slow down or stop when you need to. With our braking sessions we transform your braking so that you are more confident on the trail and brake only when you need to. Dragging your brakes will be a thing of the past once you know how they work properly! Braking is an essential part of mountain biking and it is a skill that you want to be really good at. Check out this blog post or our video to get an idea of how to get more out of your brakes!
Cadence – Going the Distance
Using our gears is one thing – but what is commonly overlooked is what our cadence should be and how to get there. This will help us get the most out of our mountain bike rides. We generally identify those who will benefit from a little exercise so that they can feel what a good cadence is all about. This one doesn’t ever take more than a few minutes to master the skill but then it makes a huge difference to the distances that we can cover in a day!
Get that POP – The First Step to Jumps
POP is a beautiful thing! How to jump a mountain bike is one of those things that we all start to just do without necessarily knowing how or why. Teaching jumping will give you better understanding of skills like pressure control, understanding and the ability to keep your wheels on the ground if you want to or boost into the air if that is what you are wanting to achieve! A good tradesman never blames his tools – learn how your bike gets airborne and be more stable in the air! It is a very common question, how do I do jumps on my mountain bike?
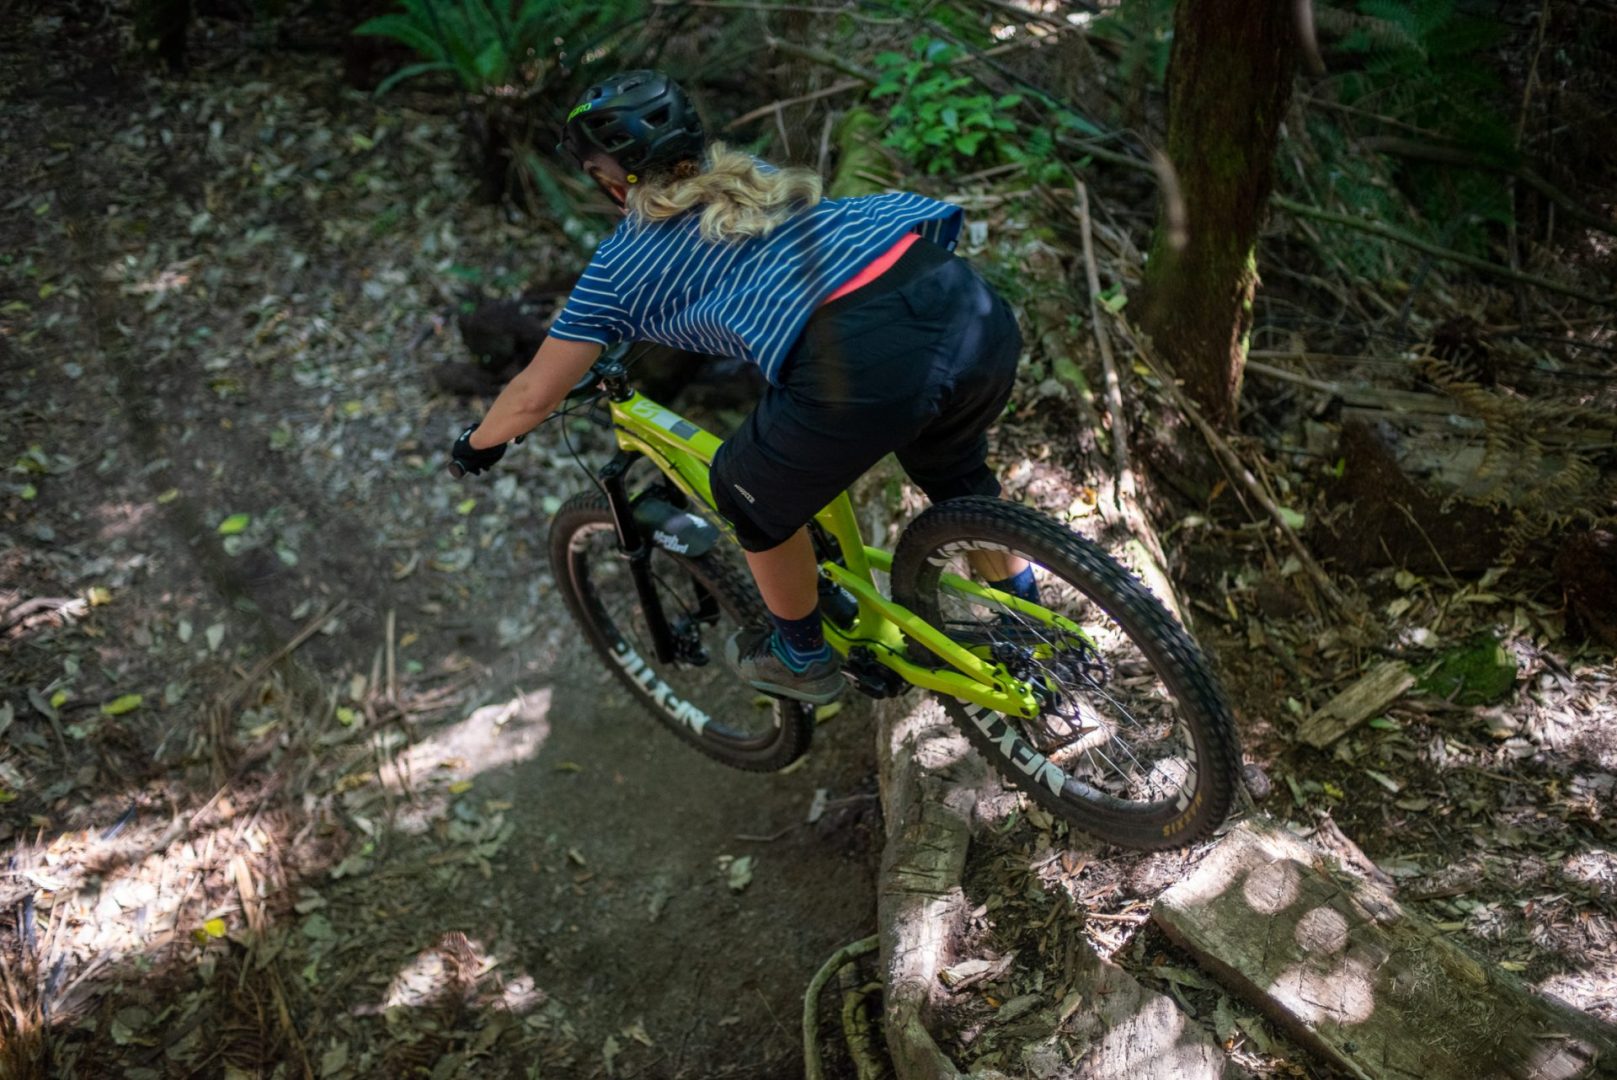
Drop offs – Riding with confidence
How to ride drops whether they are big or small – slow or fast – mellow or huckable. We have some tips to build your skills and ride them in control!
We give safe progressions and have taught hundreds of riders this awesome technique to not only ride drops, but be in control for the piece of trail right after the landing. Progress safely, confidently, and with some expert advice with a MTB lesson – but don’t forget to check out this video where Chickens and Mountain Bikers work together to tackle rollovers into drops!
Check out our YouTube Channel here
The Dirt on the Details
INCLUSIONS
3 hours of personalised MTB coaching with an experienced mountain bike instructor.
Video analysis to help fine-tune your riding and help you understand what you are doing on your bike.
Good times out in the forest with your instructor and friends (up to 6 per group – *Extra fees apply*)
Things to work on when the lesson is over so that you keep progressing until the next session
*Extra people are $100pp
EXCLUSIONS
Bike & personal riding gear. Please bring your own bike! Ensure your bike is well maintained.
Transport – we’ll give you a time and place to meet in Rotorua. Coaching sessions meet at the forest.
Extra personal riding gear. Eg. elbow pads, water/hydrations system backpack etc
How about the WEATHER?
Wondering about our policy regarding postponing due to weather? We are always keeping an eye on the weather and know the forest conditions because we are in there every day. If the weather really looks nasty, we will give you the option to reschedule the evening before. If it is dangerous (generally more to do with the wind) and we need to cancel, we will give you the option to reschedule. Let us know if you have any questions regarding this as we are happy to help.
Frequently Asked Questions
Personalised one-on-one or small-group sessions focused on your riding goals, from body position to jumping or finding extra speed.
We start with a short assessment conversation and ride to identify areas for improvement, then target specific techniques.
Usually 3 hours, but we can extend to a full day. It’s easy, just book the morning and afternoon sessions.
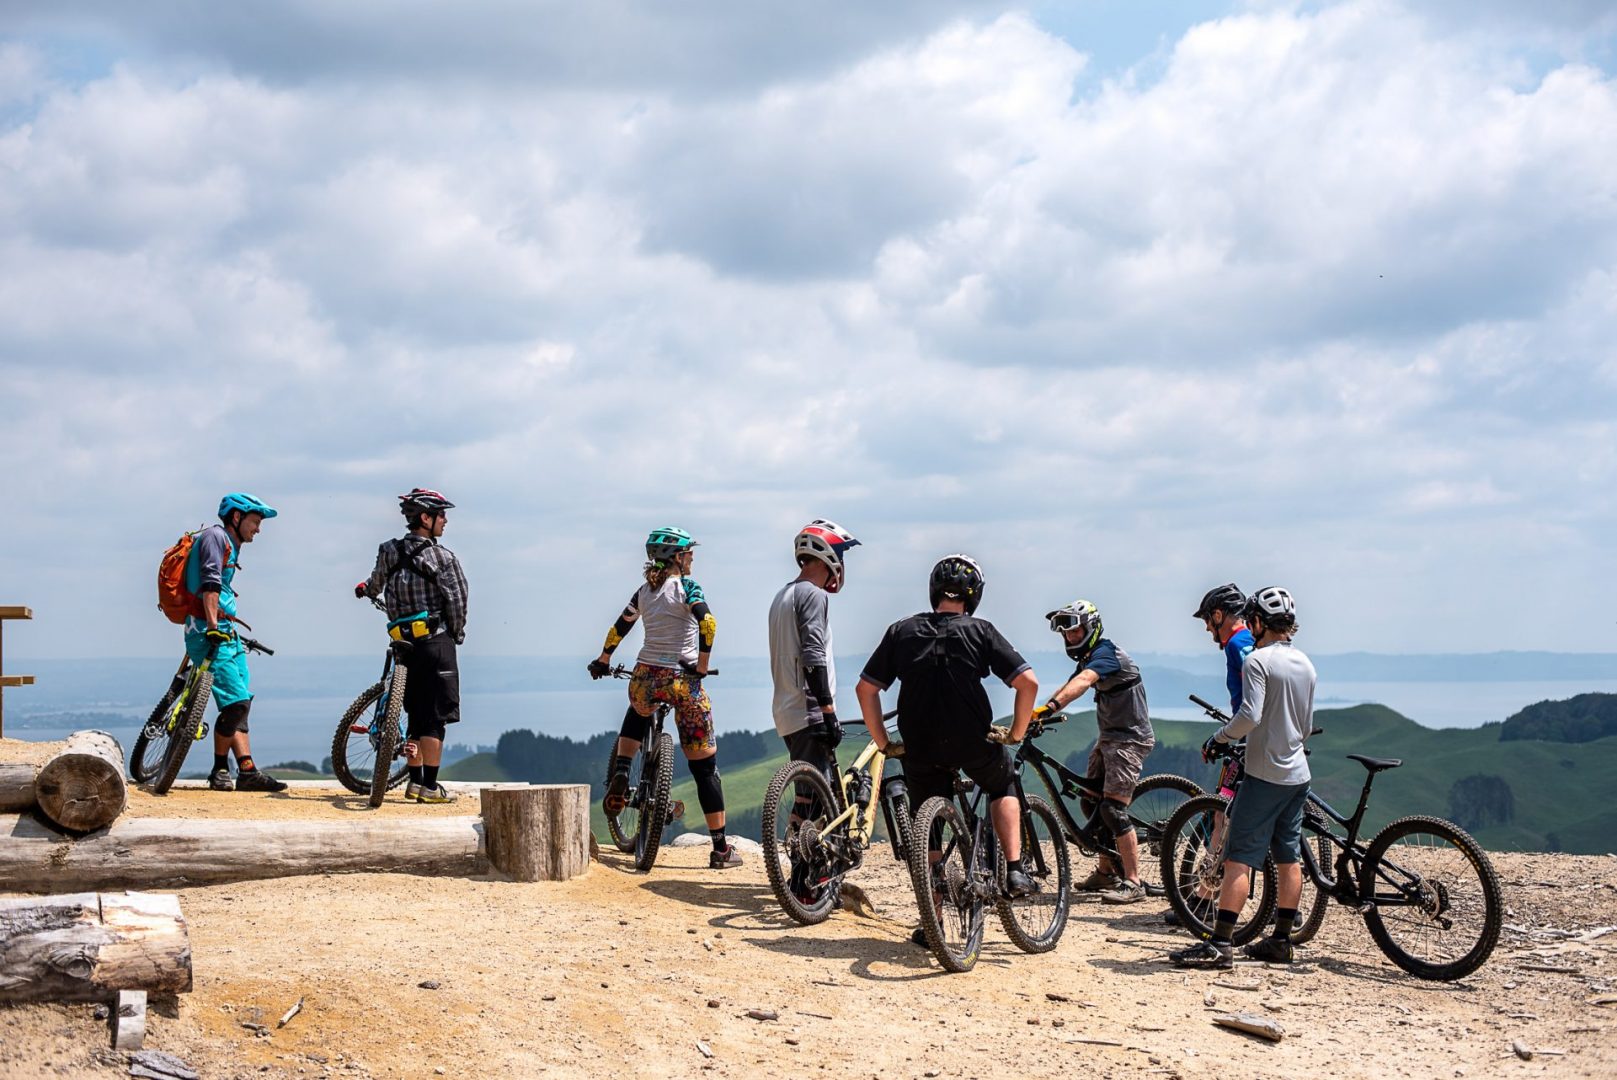
Primarily in Rotorua’s Whakarewarewa Forest, with access to world-class terrain.
Yes, we can travel by arrangement, passing the travel cost to you.
Absolutely, private sessions are perfect for new riders wanting to build confidence and build a solid foundation to progress from.
Yes. You can add up to 5 riders for a small-group rate. It is a great way to share the new skills and progress together.
Yes, we provide post-lesson debrief, drills, and optional videos from any video analysis.
Gallery

“I signed up for 5 mountain bike lessons with NZMTB. I had Christy as my instructor and I can’t believe how much my confidence grew and how much more in control I now feel!”